GoodGraphics05.png, Sin Waves, Spatial Partitioning, And Culling

This is a big jump from the previous image.  Here, we built a plane of cubes and then applied sin waves to it to create ripples.  Additionally, the whole thing used a very primitive spatial partitioning so that we could group uniform sections of the plane into cells and perform operations on all objects in the cell together.  The simple test was to have an inner and outer culling radius; when a cell hit the inner culling radius all objects in it turned wireframe and then were culled completely upon reaching the outer culling radius.

Some notable updates on the purely graphics side of it was that models were finally being loaded in from files (albeit files that I had to construct by hand), and the camera was improved enough to give rotational control as well as the already existing translational control.  Also, it was the very primitive start of a DirectX state management system that gave the ability to switch individual models to wireframe and back.  Most importantly, depth buffering finally worked.

This image was taken on 7/24/12.

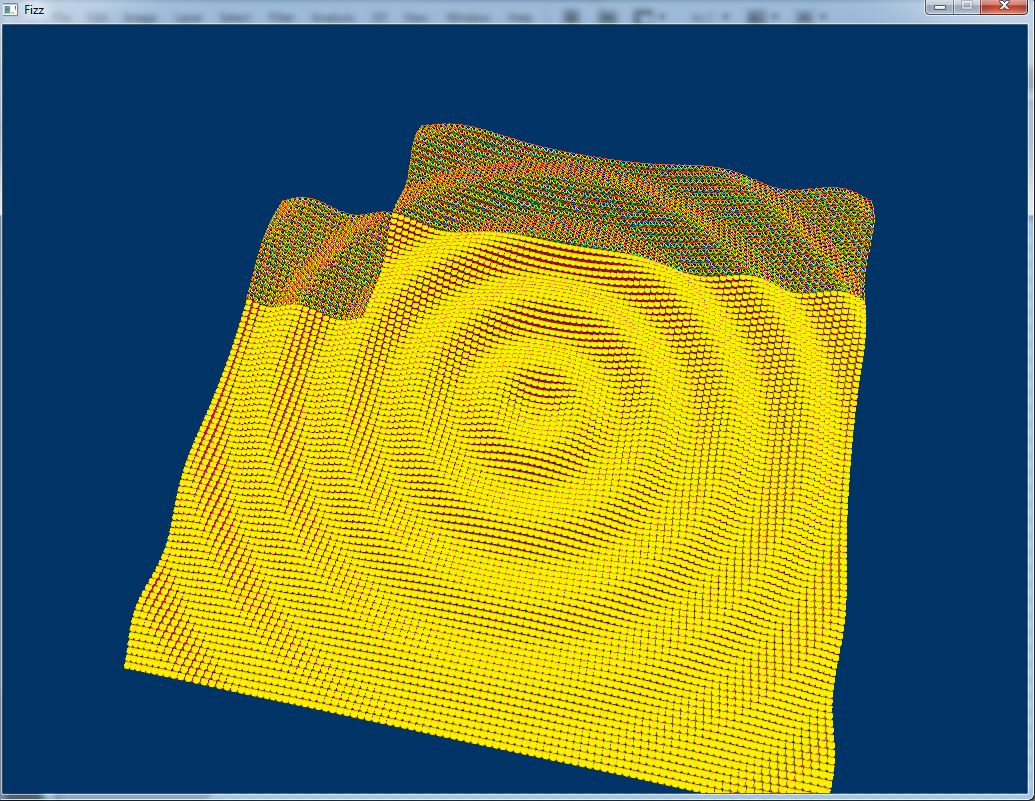
GoodGraphics05.png, fun with math and spatial partitioning.

GoodGraphics04.png, Making Lots Of Cubes

With the success of getting a textured 3D model into the engine, I thought I’d have some fun with it at this point.  Fun is apparently building a huge cube of cubes.  This is a 20x20x20 stack of cubes, built to test that I could actually handle more than a single object in the engine and to start doing a little stress testing.  You’ll notice that I hadn’t gotten the depth buffer fully functioning yet, producing a really weird screen capture.  All mesh data was still hardcoded, but the camera was improved enough to be able to back out enough to capture the whole scene.  But not improved enough to be able to pan around it.  Go figure.

This image was taken on 7/14/12.

GoodGraphics04.png, a lot of textured cubes with no depth buffering.

GoodGraphics03.png, Now With Texturing

The next step was to add texturing to my 3D cube.  I took a texture we had used in my 2D game the previous year (if you ever played Coalescence, you’ll recognize it as the solid element) and put that on every face.  Literally the simplest UV unwrapping I could do.  Also, all of the mesh data was still hardcoded.  And the camera was still terrible.

This image was taken on 7/11/12.

GoodGraphics03.png, a simple textured cube.

GoodGraphics2.png, Now In 3D

The second step in building my DX11 graphics engine was to move from drawing an untextured quad to drawing an untextured model.  Pretty exciting stuff!  The camera at this point was so primitive that this was the best capture I could take that actually showed the 3D nature of the cube. Also, I’m pretty sure that all of the mesh data was hardcoded at this point.

This image was taken on 7/10/12.

GoodGraphics02.png, a simple untextured cube.

GoodGraphics01.png, The Start

When I joined Team Fizz over the summer, it was to specifically focus on graphics development.  Even though I’ve also been part of a lot of engine architecture work, graphics is my primary role and one that I’ve tried to embrace by learning everything I can as I go.  One decision I made when I started was to completely start from scratch in DirectX 11 instead of rehashing the DX9 engine I built last year and updating it for 3D.  In doing so, I’ve also pseudo-documented my progress in a series of screen captures that I’ve titled GoodGraphicsXX.  Going forward, I’ll be posting those here as I make them, but for all previous images I’ll be back posting them in quick succession right now.

This is the image that started it all, GoodGraphics01.png.  It’s a pretty unexciting untextured quad, and took over a week to get to this stage.  Which is pretty embarrassing.

This image was taken on 7/7/12.

GoodGraphics01. A simple untextured quad.